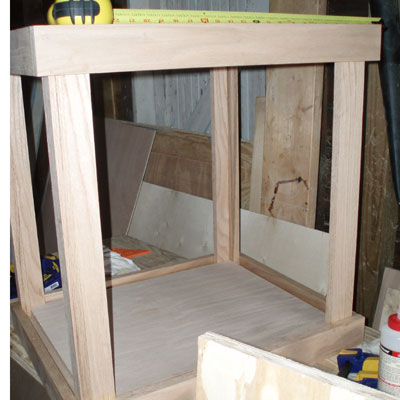
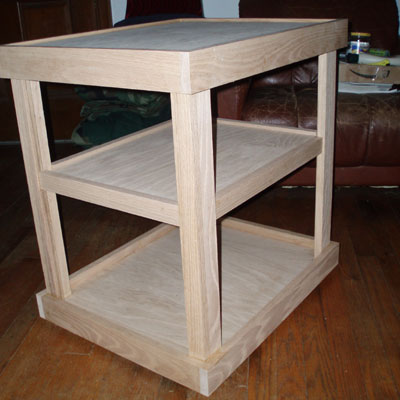
As you may recall, Liza's cabinet looks something like a box kite. I added panels to 3 sides of it and left one open. This stand will have all sides open. Partly because I want to it to be lighter so it is easier to move. In addition to the general frame, I needed to add in a shelf. This way the projector will have a place to sit when it is stored. I am not sure if I want to close it up further since I do have other things to put in there (cables and the screen) but for now I am keeping it simple.
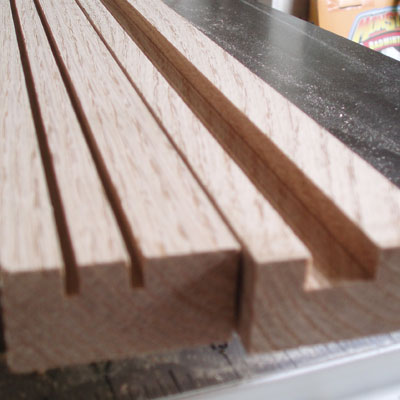
For the shelf I had to make something a little more solid and easy to attach. 4 boards were cut to fit within the upright legs and act as supports. I used the table saw to make a 1/2\" slot into the boards. I made two 1/4\" deep groves in it so that the spacing was correct and then ran it through repeatedly at different widths to cut away the middle. There are better ways to do this but I am most comfortable with this method since it lets me be more accurate. I need all the help I can get!
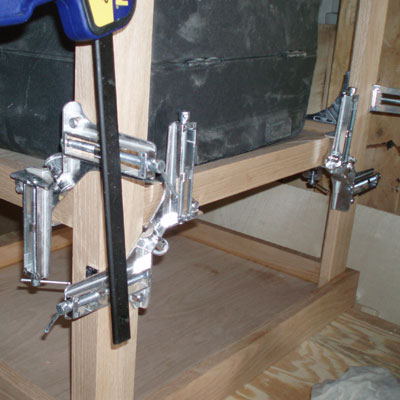
The supports were cut to fit very tightly. They were able to stay in without any glue at all. Of course I did glue them anyhow. The process went like this. I set up the 90degree brackets so that the sides would be at the right place. I then put glue in the groove and on the ends of two of the opposing boards. The boards were then slid into place so that they were flush with the outside of the legs. I then placed the shelf board in so that it rested in the groove of one side board.
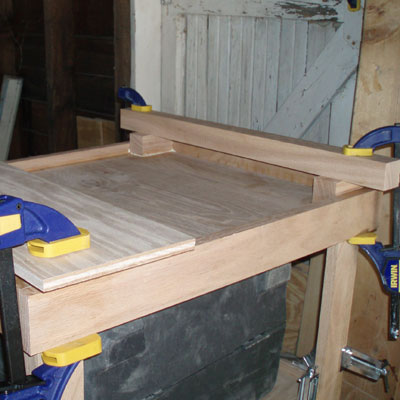
Next I pushed on both side boards so that they moved in to meet the shelf. Once that was done I tightened the clamps and repeated the process with the other two sides. Next I put on the feet and clamped them on using a board crossing two feet at once. After that a good overnight drying. The next night I took a router to most of the corners the outside corners and sanded it all smooth. I didn't have to worry about sanding as much as usual since I had the benefit of my new planer! The planer evens out bumps in the surface in the boards and make is about as smooth as 120 grit paper will.
And thus it's done! For some reason the feet are a little uneven. I am not sure if it is the feet themselves, or the hardwood floor. But I will check that tonite. I also need to throw a coat of stain on and seal it. For the most part it's ready to go. I find it amusing though, that Liza loves sleeping in it. Maybe that will change once the stain goes on. We'll see. |